
A reticulated foam pre-filter only works as well as it is installed. The right PPI and thickness can still give poor results if the pad leaves a gap at the edge, bows into the fan, is fitted in the wrong place in the airflow, or is not cleaned before resistance climbs too high.
This guide covers the practical side of using reticulated foam as an air pre-filter: where it is used in equipment, where it belongs in the airflow, how much space it needs, how it is held and sealed, and how it is maintained and replaced.
For an overview of reticulated foam as an air pre-filtration material, see Reticulated Foam Filter Media: A Guide to Air Pre-Filtration.

Key Takeaways
Reticulated foam is used as a washable first stage in HVAC equipment, electronics and telecom enclosures, machinery housings and similar equipment, to protect fans, coils, heat sinks and finer filters downstream.
Install it on the intake side, upstream of the parts it protects, and where it can be reached for maintenance.
Space means more than the pad’s outer size: installation depth, face area, retention and clearance for removal all need checking.
Support the downstream face so airflow cannot bow the pad or pull it into a fan.
Bypass leakage is the most common installation failure. A ¼-inch gap around a 24 × 24-inch filter can let about 18% of the air bypass the media.
Clean or replace based on pressure drop or inspection, not only on a fixed schedule. Replace pads that are torn, crumbling, permanently flattened or no longer fit tightly.
Short answer: Reticulated foam pre-filters are used wherever equipment draws in air that must be kept free of coarse dust, lint and fibers at low airflow resistance. Typical applications are HVAC air handling units and fan coil units, electronics enclosures and server or telecom cabinets, machinery housings, compressors and blowers, and intake grilles. In most of these, the foam protects something downstream, such as a coil, fan, heat sink or finer filter.
Typical Equipment and Installation Forms
| Equipment | Typical location of the foam | Typical form | What the foam protects |
|---|---|---|---|
| Air handling units (AHUs), rooftop ventilation units | Intake or return section, ahead of finer filter stages | Pads in frames or panel filters | Downstream filters and coils |
| Fan coil units (FCUs), packaged terminal and split AC units | Return-air intake | Cut pads or drop-in panels | Coil and fan |
| Electrical enclosures, control panels, UPS units | Fan or vent opening | Fan filter assemblies: guard, foam pad and retainer | Electronics and heat sinks |
| Server racks, telecom cabinets, power distribution units | Door or chassis intake | Filter trays, door panels, inserts | Fans and electronic assemblies |
| Machinery enclosures, compressors, blowers | Air intake or housing vents | Die-cut pads, intake covers | Motors, bearings and internal components |
| Outdoor enclosures | Intake vents | Foam behind louvers or hoods | Internal equipment from dust and debris |
When Reticulated Foam Is a Good Fit
Reticulated foam is worth considering when the application needs:
Low airflow resistance, especially with small fans or limited static pressure.
A washable, reusable filter.
Pads cut to non-standard shapes, sizes or thicknesses.
A first stage that protects a finer filter.
It is not a substitute for a fine or high-efficiency filter where the application requires one. How capture and resistance depend on PPI and thickness is covered in How Reticulated Filter Foam Captures Dust: Airflow, Thickness and Pressure Drop.
2. Where Should the Foam Be Placed in the Airflow?
Short answer: Place the foam on the intake side, upstream of the fan, coil, heat sink or filter it protects, so that air passes through the foam before reaching them. Make sure all of the air entering the equipment passes through the foam, and that the pad can be removed without dismantling the unit.
Placement Rules
Upstream of what it protects. Fan filters are usually installed on the intake side. Dust captured before the fan cannot settle on blades, bearings, coils or circuit boards.
In the full air path. Any opening that admits air without passing through the foam, such as an unfiltered vent, cable entry or panel gap, reduces protection.
Coarse before fine. In multi-stage systems, the foam pre-filter sits ahead of the finer stage and takes the bulk of the coarse load.
Accessible. Position the pad where it can be inspected, removed and refitted easily. A filter that is hard to reach tends to be maintained less often.
Airflow Direction
A single-layer pad of uniform foam is usually not directional. Some products are, however:
Pads laminated to a support mesh.
Pads made of layers with different PPI.
Pads with a bonded frame or gasket on one face.
For these, mark the airflow direction on the part or drawing. Reinstall cleaned pads in the same orientation.
3. How Much Space Does a Foam Pre-Filter Need?
Short answer: Check four things: installation depth for the foam thickness, the face area that sets air velocity, the internal dimensions of the frame or opening, and clearance to remove and refit the pad. A pad that matches the old one in PPI and outside size may still not fit if its thickness or retention method is different.
What to Check
| Dimension | Why it matters | How to check |
|---|---|---|
| Installation depth | The frame, slot or housing must accommodate the foam thickness and any support mesh or retainer | Measure the internal depth of the slot or frame |
| Face area | A smaller face area raises the air velocity and the resistance | Measure the open area the air passes through |
| Frame or opening size | Sets the outer pad dimensions and how tightly the pad fits | Measure the internal frame dimensions, not the outside of the housing |
| Removal clearance | The pad must come out and go back in without tearing or folding | Check access space in front of or beside the frame |
A thicker pad generally captures more dust and holds more, but it also adds resistance and needs more depth. If depth is limited, increasing the face area, where the design allows it, lowers the air velocity, which in turn lowers the resistance. These trade-offs are explained in How Reticulated Filter Foam Captures Dust: Airflow, Thickness and Pressure Drop.
Fit Allowance
Some installations rely on the foam being slightly larger than the opening, so the pad stays in place by friction and seals at the edges. Others use a frame or retainer and need the pad to drop in freely. Either way, the intended fit should be defined on the drawing rather than left to whoever cuts the foam. How outer dimensions, thickness and tolerances are specified is covered in Reticulated Filter Foam Specifications: PPI, Thickness, Sheets and Rolls.
4. How Should Foam Pads Be Retained?
Short answer: Foam pads are typically held by a friction fit in a frame, by a guard and retainer assembly, by clips or channels, or by bonding or lamination to a support. Whatever the method, the downstream face should be supported so the pad cannot bow under airflow or be pulled into a fan, and the retainer should hold the edges without tearing them.
Common Retention Methods
| Method | How it works | Points to check |
|---|---|---|
| Friction fit | The pad is cut slightly oversize and pressed into a frame or opening | Enough edge contact to stay in place; pad not distorted or buckled |
| Guard and retainer | The pad sits between a guard and a removable retainer, as in fan filter assemblies | Retainer clamps the edges evenly; pad replaceable without tools |
| Clips, channels or rails | The pad slides into channels or is held by clips | Clips do not cut or tear the foam; channels hold the full edge |
| Support mesh or grille | A mesh or perforated plate supports the downstream face | Mesh opening large enough not to add significant resistance |
| Bonding or lamination | The foam is bonded to a frame, mesh or gasket | Adhesive compatible with the foam; bond survives cleaning if the pad is washed |
Preventing Deflection
Airflow pushes on the pad, and that push increases as the pad loads with dust and resistance rises. Without support, a large or thin pad can bow downstream. It may then open gaps at the edges or, in the worst case, be drawn into a fan. Practical measures:
Support the downstream face with a mesh, grille or rib structure.
Use a thicker pad, or add more support points, for larger spans.
Check the pad’s position after the first period of operation, when resistance has started to rise.
5. How Is Air Bypass Prevented?
Short answer: Bypass happens when air flows around the foam instead of through it, through gaps at the edges, corners, joints or the surrounding housing. Prevent it by ensuring continuous edge contact or a gasket seal, avoiding joints in the pad where possible, and checking the installed pad for light gaps or with a smoke test.
Why Small Gaps Matter
Air takes the path of least resistance. A gap at the edge of a filter offers far less resistance than the media, so air goes there first. For panel filters, a ¼-inch gap around a full-size 24 × 24-inch filter has been estimated at about 18% bypass, equivalent to a 3-inch hole in the middle of the filter. Tests on other filter types have also shown large losses in effective efficiency from 10 mm gaps. A foam pad rated for the job will underperform if the air can go around it.
Where Bypass Occurs
| Location | Typical cause | Remedy |
|---|---|---|
| Pad edges | Pad undersized, shrunk or distorted | Correct fit dimensions; replace pads that no longer fit |
| Corners | Square-cut pad in a frame with radiused corners, or vice versa | Match the corner profile on the drawing |
| Joints between pads | Two pieces butted together | Use a single piece where possible; if joints are unavoidable, overlap or support them |
| Frame-to-housing interface | Frame not seated, damaged or missing gasket | Seat the frame fully; fit or replace the gasket |
| Unfiltered openings | Other vents, gaps or cable entries | Seal or filter them |
How to Check
Light check. With the unit off, look for light around the pad edges from the downstream side.
Smoke test. With the unit running, a smoke pencil near the edges shows whether air is bypassing.
Visual dust trail. Dust tracks on the downstream side of the frame or around the pad edges indicate bypass paths.
Gaskets on frames should be inspected at each filter change and replaced when they show wear or damage.
6. How Should Foam Pre-Filters Be Cleaned and Maintained?
Short answer: Clean or replace the foam when its pressure drop reaches the limit the system can accept, or at an interval set by inspection. Remove loose dust, then wash in lukewarm water with a mild detergent, flushing from the clean side. Squeeze rather than wring, rinse until the water runs clear, and let the pad dry completely without heat before refitting it in the same orientation.
When to Service
| Approach | How it works | Best suited to |
|---|---|---|
| Pressure drop | Record the clean pressure drop at installation and service the filter when it reaches the system’s final limit, using a differential pressure gauge across the filter | AHUs and larger systems where a gauge can be fitted |
| Inspection interval | Check the pad visually at set intervals, then adjust the interval to how quickly it loads | Enclosures and small equipment without gauges |
| Equipment indicators | Rising component temperatures, reduced airflow or fan alarms | Electronics and cooling systems |
The right interval depends on the dust load at each site. Start with frequent inspections and lengthen the interval once the loading rate is known.
Cleaning Procedure
Remove the pad carefully. Note its orientation.
Remove loose dust by tapping or with a vacuum. If you use compressed air, use low pressure from the clean (downstream) side and keep the nozzle at a distance; a concentrated jet can tear the foam.
Wash in lukewarm water with a mild detergent if needed. Flush from the clean face towards the loaded face, so dust leaves the way it came in.
Squeeze; do not twist or wring. Twisting a saturated pad can tear the struts.
Rinse until the water runs clear and no detergent remains.
Dry completely at room temperature. Do not use heaters, hot-air guns or direct heat, which can damage polyurethane foam.Drying can take several hours or longer depending on thickness.
Inspect for tears or damage once dry.
Refit in the original orientation, and check the edges for gaps.
Keeping a spare set of pads lets equipment keep running while the cleaned set dries.
Cleaning Agents and Material Compatibility
Use the mildest cleaning method that works. If heavier contamination such as oil requires a stronger cleaner, first confirm that it is compatible with the foam’s base material. Polyester-based and polyether-based foams respond differently to water, solvents and chemicals, as explained in Reticulated Filter Foam vs Regular Sponge: What Is the Difference?. Follow the equipment manufacturer’s instructions where they exist. For example, some engine and power-equipment foam filters are designed to be re-oiled after cleaning.
When to Replace Instead of Clean
Replace the pad when:
It is torn, holed or has crumbling edges.
It has taken a compression set (permanent flattening) and no longer fills the frame depth.
It has shrunk or lost its shape, leaving gaps at the edges.
Its pressure drop no longer returns to near the clean value after cleaning.
It has become hard, sticky or brittle.
The equipment manufacturer’s replacement interval has been reached.
7. How to Specify a Replacement Pad That Fits
Short answer: Record the existing pad’s dimensions and condition before ordering, including the frame’s internal size, the pad’s thickness, PPI and material if known, its corner profile and features, its airflow direction and how it is retained. Measure the frame as well as the old pad, because a used pad may have shrunk, compressed or been cut to fit.
What to Record
| Item | How to record it |
|---|---|
| Frame or opening | Internal length, width and depth, measured on the frame |
| Existing pad | Length, width and thickness, measured relaxed on a flat surface |
| Fit | Whether the pad was oversized for a friction fit or dropped in freely |
| Shape and features | Corner radii, holes, notches or cutouts and their positions |
| Material and PPI | From labels, drawings or purchase records; if unknown, send a sample |
| Retention | Friction fit, retainer, clips, mesh or bonding |
| Airflow direction | For laminated or layered pads |
| Photographs | Pad in place and removed, with a ruler visible |
From Record to Order
Once these details are known, the replacement can be described with the specification formula in Reticulated Filter Foam Specifications: PPI, Thickness, Sheets and Rolls.
If the original material is unknown, it can be identified as described in Reticulated Filter Foam vs Regular Sponge: What Is the Difference?
For first orders, confirming fit with a sample before production avoids surprises. How samples and approval are handled is covered in How to Evaluate a Reticulated Filter Foam Manufacturer.
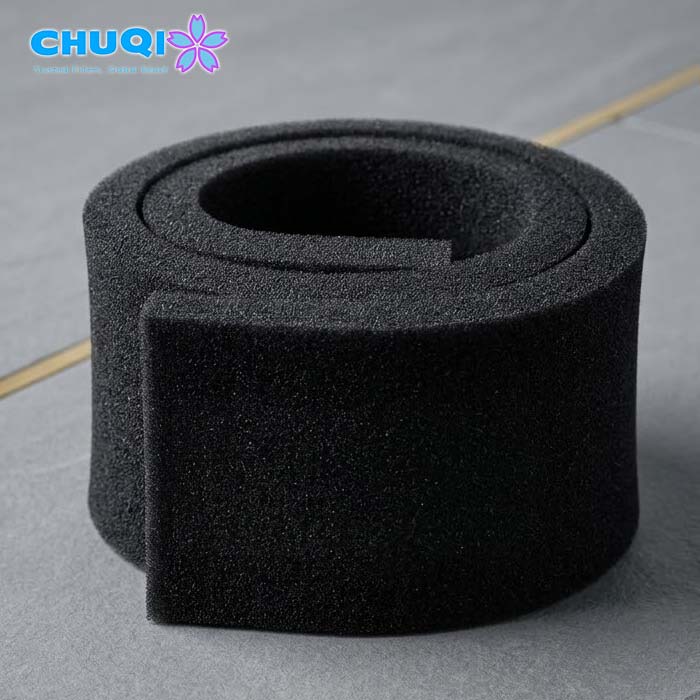
Our range: Our reticulated foam is available as 1 × 2 m sheets, whole rolls and cut or die-cut pads, in thicknesses from 3 to 50 mm and nominal 10–60 PPI. Replacement pads can be cut to the frame dimensions or drawing you provide.
Summary
A reticulated foam pre-filter performs as installed, not as specified on paper.
Place it right. On the intake side, upstream of what it protects, in the full air path and within reach.
Fit and seal it. Enough depth and face area, a supported downstream face, and no gaps at edges, corners or joints.
Maintain and replace it on evidence. Service on pressure drop or inspection, clean gently, dry fully, and replace pads that are damaged or no longer fit.
Review the listed PPI range, thicknesses and supply formats on our product page:
Explore Our Specific Filter Foam Products
If you need replacement pads or a pre-filter for new equipment, send us the equipment type, the frame or opening dimensions, the available depth, the retention method and photographs if available. We will help you work out a pad that fits and seals.